From the East Bay to Montego Bay

Tuesday, June 26, 2012

I'll just go ahead and apologize on behalf of Graham for a rather long hiatus from the blog. The last few months have been filled with a lot of physics, scrambling to figure out where we are off to next, planning our wedding, and very little creativity in the food department or time for extra-curricular blogging.

To make up for it, I bring you something spectacular: a perfect cocktail. Cocktails generally have been a thing I chose to splurge on when someone else makes them for me. Upon sampling this beauty on a dear friend's back porch in Oakland, however, I made an almost immediate trip to the liquor store to procure the necessary (and admittedly pricey) ingredients to make it at home... ten nights in a row. Having just finished our third bottle of rum devoted entirely to making this drink, I don't think it is much of a stretch to call this the best cocktail I've ever had.

Montego Bay
via Ashleigh via Flora via... Jamaica?
All Said and Done
  • 1.5 shots Jamaican rum
  • 0.75 shot honey syrup (see below)
  • 0.25 shot allspice dram
  • 0.5 shot lime juice
  • 0.5 shot grapefruit juice
  • Dash of herb saint
  • Dash or few of bitters
The Minimal Directions
  1. For the honey syrup, heat equal parts honey and water over low heat in a sauce pan and stir until well mixed. Let cool to room temperature before use (feel free to throw in an ice cube to encourage cooling).
  2. Mix everything together and serve with crushed ice or a couple of ice cubes. We are normally too impatient to make the former.
NB: If you are not a fan of manual labor, you may want to consider purchasing some volume of lime juice ahead of time.

When Life Gives You Intestines...

Saturday, December 3, 2011

I can't imagine what was going through the head of the first person who decided that repackaging an animal in its own innards was a good idea — seems like it would be hard to arrive at this conclusion without very intense deliberation (oh my! this meat emulsion has accidentally fallen into this cleaned intestine, and it's delicious!) Nevertheless sausage, mostly in the form of various offerings at Berkeley Dog, has become the perpetual exception to an otherwise meatless existence. Following the unexpected arrival of a Charcuterie book from Annie, it's been in the back of my mind to take advantage of these under-appreciated pig parts. Reading about all of the cured meats builds a healthy appetite, though it also nurtures a slight but nagging fear of botulism. What's life without risk! We'll stick to fresh sausage for now — mostly since the chosen packing method isn't particularly conducive to sanitation.

The original intent of the weekend was to head out climbing somewhere for a few days with Nick. Extended intense outdoor activity was cut short by weather and scheduling issues — so the plan was to fall back on some equally absurd culinary adventure. It's not like we were prepared to pack sausages — far from it. Chrome plated sausage cannons are available on Amazon but carry the price tag of a used car — an unlikely purchase. Nothing so fancy is required at any rate. As it turns out one can stuff an astonishing 6 sausages an hour with a sawed-off turkey baster and a wooden-spoon turned ramrod. I might recommend exploring other options. Nevertheless, the mission was accomplished. You could just make lamb patties, which I'm sure would be equally tasty.

You should be able to get the necessary lamb or pork fat from most meat establishments. Lamb fat comes highly recommended — we even rendered some for imparting lamby flavors in the least expected circumstances. The sausages were staggeringly good given the circumstances of their creation. I'd say it's worth trying this out at least once. In the words of the book's sender: "Like a fine terrine, let your love be a meat pot." Words to live by.


Fresh Lamb Sausage
Inspiration from the cookbooks "Fat" and "Charcuterie"
Makes 6 Large Sausages
8 Hours Prep, 10 Minutes to Cook
The Goods
  • 2.25 Lb. Lamb Shoulder
  • 0.5 Lb. Lamb or Pork Fat
  • 0.25 Cups Rosemary or other desired herbs and spices
  • 3 Cloves Garlic, mashed or minced
  • 0.8 Oz. Salt
  • 1 Tsp. Ground Black Pepper
  • 0.5 Cup Red Wine, chilled
  • 6 Feet Sausage Casing
The Procedure
  1. Chop the meat and fat into smaller chunks, removing any connective tissue. Mix in the herbs, salt, and pepper and let stew for several hours in the refrigerator (or until very cold, almost frozen, in the freezer.) Place any grinder parts, and the bowl you'll use for collection in the freezer for a while before starting to grind. Also let the casings soak in warm water for an hour or so before stuffing, and flush with cool water before using.
  2. Grind the meat into the receptacle bowl, and then mix (either with a stand mixer or by hand) until somewhat pasty. Add the red wine and mix for a while longer. Let chill in fridge for another hour or so, or in the freezer if you're impatient.
  3. By whatever means available to you, stuff the sausage mixture into the casings. You may, of course, completely skip this step and simply make patties instead. If making sausages, twist off every six inches or so.
  4. Cook by your favorite means — we braised them in a pan, but anything should work. Low heat and time is best.
NB: Please ignore the large amount of fat that escapes during cooking… it's the good kind of fat...

A Non-Standard Pizza

Sunday, September 25, 2011

Another post from Meg, savior of the blog...

Our tomatoes ceased ripening before our summertime pizza cravings subsided. Fortunately for us, tomatoes are not a necessary constituent of a tasty pizza. Recall the "white pizza:" leave off the tomato sauce and add a healthy dose of ricotta, parmesan, and mozzarella. I remember hating it as a kid, likely because the removal of tomato meant adding way too much cheese as a substitute for which, it seemed, my childhood palette wasn't quite ready. Even now, gobs of cheese are exactly what we shy away from when attempting to craft a satisfying pizza. We are here to offer you a tame twist on the thing we hated as kids, but can't seem to get enough of now.

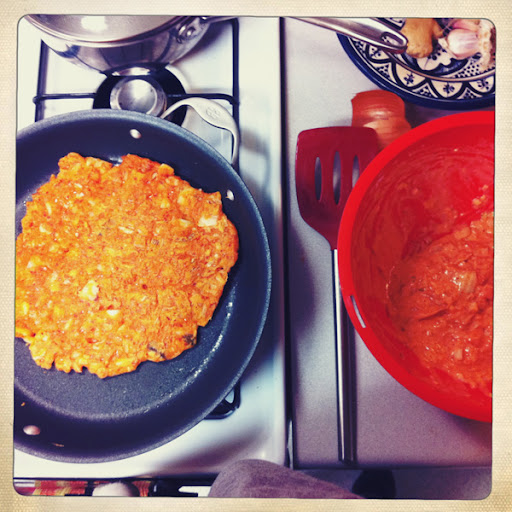
In the true spirit of Meg and Graham cooking, we suggest making your own ricotta cheese. The thought of making cheese often scares otherwise talented kitchen explorers, but we are here to proclaim that soft cheese making (we haven't tried the hard stuff yet) is not difficult. Not at all. Heat up some whole milk, add a little citric acid, watch the curds separate from the whey, and let drain in a cheese cloth until desired consistency is reached. If citric acid sounds a little too science lab for you, others make it with buttermilk, vinegar or lemon juice. We leave it to you to explore the options and report back.

But sauce-less pizza with homemade cheese isn't the craziest part. Oh no.

We started putting grapes on our pizza.

It sounds like something a three year old child would request and, really, I was skeptical too. But, I came across this recipe a while ago and have been intrigued ever since. It wasn't until I started spending my Saturday mornings working for a fruit vendor at the Irvine farmers market that grapes became an abundant feature in our kitchen. So, having a mound of homemade ricotta still waiting to be used, I decided to adapt this recipe to our pizza ritual. It's so good I almost forgot that tomatoes once inhabited the same space. So, here you have it, a not-terribly-cheesy white pizza with some late summer grapes to keep life interesting.

White Pizza with Grapes
Inspiration from here
Makes Two Pizzas
2 Hours Prep, 30 Minutes to Cook
The Goods
  • 2 Pizza's Worth of Dough, try our Recipe
  • 2 Cup Ricotta (see suggestions for homemade version above)
  • 1 Cup Parmesan or other hard aged cheese, grated
  • 4 Cloves Garlic, Minced
  • 1 Cup Grapes
  • 2 Shallots
  • Few Tbsp. Olive Oil
  • Few Pinches Thyme
  • Few Pinches Salt and Pepper
The Procedure
  1. Make and prepare the pizza dough. Might we suggest our recipe...
  2. Cut grapes in half. Slice shallot into not-terribly thing rounds. Place together on a baking sheet with a little bit of olive oil and roast at 375F for 10-15 minutes. Check to be sure the shallots are not burning every now and then. Once the roasting is finished, adjust oven temperature to 450F.
  3. Stir garlic into ricotta. Add salt, pepper, and a few pinches of thyme to taste.
  4. Shape pizza dough and coat with a tablespoon or two olive oil. Spread ricotta mixture onto dough. Depending on the size of your pizza dough, 1 cup of ricotta might be too much or too little. Think "thin layer," not "how much can I fit on here." Sprinkle with parmesean (again, not too much) then top with the roasted tomatoes and shallots.
  5. Cook pizza at 450 for about 10 minutes. Let cool and serve.
NB: For the beer brewers out there, try adding some of your spent barley to your pizza dough crust. You won't be disappointed.

When Life Gives You Tomatoes

Monday, August 1, 2011

Yes garden, furnish us with tomatoes. No garden, not that many at once please. As with zucchini overpopulation crises weathered earlier in the season, I suppose this is a manageable abundance. If only there were some dish consisting predominantly of tomatoes thrown into a pot and left alone — ah ha! I recall following at least some of the unnecessary extra steps back at BU: a roux? a food mill!? Perhaps it was youthful exuberance driving me to do such things, though I'm inclined to believe it was more of an embarrassing excess of time than anything else. Well now we are down to the essence of things. Screw the food mill, we have a stick blender!

This comes from a rather intense book, Classic Techniques of Italian Cooking, that includes a recipe for a whole pheasant. One should, of course, display the original wings alongside the cooked bird in a fruit bowl thereafter "placing the neck and head in position, creating the pleasant illusion that the live bird is eating the fruit." No, thanks. Tomatoes are cooked whole, wings or not. The sauce is unlike any other I've had, given the heavy citrus flavor afforded by the two uncharacteristic ingredients, enjoy!


Tomato Sauce with Lemon and Capers
Makes Four Cups
5 Minutes Prep, 30 Minutes to Cook

The Goods
  • 2 lb. Fresh Tomatoes, Quartered
  • 2 Cloves Crushed Garlic
  • 4 Tbs. Capers
  • 2 Pieces Fresh Lemon Peel
  • 2 Tbs. Olive Oil
  • 4-5 Tbs. Butter
  • 1 Lemon's Worth Lemon Juice

The Procedure
  1. Add the olive oil to a large saucepan and then add the tomatoes, capers, garlic, and lemon peel. Cook over medium heat for around 25-30 minutes. Cooking time is a matter or personal preference for sauce texture.
  2. Remove the lemon peel. Blend thoroughly with a stick blender, by other means, or not at all.
  3. Add the butter and lemon juice, mix, and season to taste with salt and pepper.

NB: Don't underestimate the power of butter…

A Nod to Nud Pob

Monday, May 9, 2011

The culinary white whale. The ruiner of woks. The thing that never tastes even remotely like what can often be found at a dingy restaurant for far less money and effort. Yes, pad thai. Most recipes I've seen call for careful and deliberate mise en place, followed promptly by the sequential yet manic addition of ingredients that somehow burn unless you manage to maintain constant eye contact. Not so much a fan of this, mostly since I almost always end up getting distracted by having forgotten something or other.

The best solution would probably be to get a really nice wok and crank it up high enough to cook food before it's even hit the pan. This sounds untenable mostly owing to the obvious financial burden of such a purchase. Instead, it works pretty well to cook separately those things which normally give our somewhat uncooperative wok a hard time: eggs and tofu.

As far as getting the authentic cheap-but-awesome pad thai flavor I couldn't possibly understate the importance of one particular ingredient: sugar. Really, that seems to be the primary factor. If you piled on twice as much as we use in the recipe below it would probably taste twice as familiar. Shrimp and chicken are possibilities as well, though I would recommend keeping the overall number of shrimp down to limit frustration during consumption. Serving with limes is really a must, and sriracha deserves mention as a worthy condiment.

A shout out to the Nud Pob near BU for getting me hooked on this stuff during undergrad (even though I remain unsure of the pronunciation). Where else could one get a quick mound of noodles if not three doors down at Beijing Cafe. Cities, I miss you.


Pad Thai
Makes Four Servings
20 Minutes Prep, 10 Minutes to Cook

The Goods
  • 18 oz. firm tofu, cut into strips and patted dry
  • 3 eggs
  • 1 bunch scallions, chopped
  • 1 cup peanuts, finely chopped
  • 12 oz. bean sprouts
  • 4 cloves garlic
  • 4 tbs. fish sauce
  • 2 tbs. rice wine
  • 1 heaping tbs. tamarind paste
  • Some chili powder, to taste
  • 4 tbs. sugar, or more
  • 14 oz. rice noodles
  • 2 limes

The Procedure
  1. Completely immerse the rice noodles in the hottest water your faucet can muster. If you don't plan on leaving them soaking for very long, or have some wimpy tap water, consider heating some water up on the stove to supplement. They should be getting soft well before you add them to the pan.
  2. Cut everything that needs to be cut, chop everything that needs to be chopped.
  3. Boil a cup of water and add it to the tamarind, stirring until it is mostly dissolved. If using a fresher block of tamarind you will need to break it apart by hand to some extent and let is soak as well. Once the mixture has cooled down a bit you can add the fish sauce, rice wine, sugar, and chili powder.
  4. In a non-stick pan on medium-high heat, saute the tofu in vegetable oil until golden-brown on all sides. Remove the tofu, add some more oil and scramble the eggs, removing them when done. The rest of the cooking proceeds fairly quickly but is less prone to disaster than trying to keep the tofu together in the wok.
  5. Put the wok on high heat, add oil and wait until it is shimmering. Make sure the noodles are waiting in their water nearby. Add the scallions and stir-fry for about a minute. Next add the garlic and cook very quickly, maybe 20-30 seconds.
  6. Making no attempt to thoroughly drain the noodles, move them directly from the water into the pan. Stir until the water is mostly evaporated, then add the sauce and cook for a while longer. After making sure the noodles are appropriately cooked mix in the bean sprouts, peanuts, tofu and egg. If things ever get too dry just add some more water. Add more chili powder to taste. Serve with something grabby, as a spoon is mostly useless. Don't forget the limes!


NB: To cut down on time, chop the peanuts in a food processors or spare coffee grinder.

The New Usual Breakfast

Sunday, April 24, 2011

Though it isn't really much of a surprise, there turns out to be a dearth of proper bagels here in Orange County. Making them turns out to be the sort of activity that consumes more time than we'd like to invest during the average week. Breakfast options can seem somewhat limited: toast is boring, eggy dishes aren't something one wants to bother with on a typical morning, and I have a hard time justifying the fist-fulls of cash one must pony up in order to take home a modicum of granola.

Of course we could just make the granola — somehow this thought hadn't worked its way into the breakfast calculus. As it turns out there is a pretty hilarious divergence in cooking times and temperatures among recipes we found scattered across the internet. Suffice it to say that some out there must have some pretty seriously dysfunctional ovens that they need crank them up to 450F to produce a batch of granola. The most important thing one can seemingly do is just stir the stuff every few minutes and stop when it's reached a nice golden brown.

Some of you may be living in some ridiculous place like Brooklyn, where local establishments carry a pretty serious comparative advantage in bagel making. I'm jealous, don't get me wrong, but the rest of us can opt for something a bit crunchier as a substitute:


Extensible Granola
Makes Four Cups
10 Minutes Prep, 30 Minutes to Cook

The Goods
  • 4 Cups oats
  • 1.5 Cups nuts
  • 1.5 Cups dried fruit
  • 3/4 Cup honey
  • 2 Tbsp. oil
  • Pinch cinnamon
  • Pinch salt

The Procedure
  1. Preheat the oven to 275F
  2. Separately reduce the nuts and fruit to a small size either with a food processor or by other means.
  3. Toss the cinnamon and salt into the oats, then thoroughly mix in the honey followed by the nuts and oil.
  4. Spread out onto lightly oiled baking sheets and bake for 7-8 minutes at a time, stirring in between cycles. The total time will typically be around 30 minutes, but it really needs to be taken out every once in a while to avoid burnage. The oats may not seem crispy even when they reach a good color, but they will firm up as the mixture cools.
  5. Once cool, mix in the fruit and store in some suitable container. It seems to keep for at least a week, though we've generally exhausted the supply well in advance of such a deadline.


NB: To keep the price down, it seems like almonds and raisins/cranberries are good choices.

A Pancake Like No Other

Sunday, March 27, 2011

In case you haven't already used that extra kimchi left over from a post or two ago, it's probably time to get on that before your fridge starts to take on even stronger odors. I offer pancakes, which taste pretty great despite coming from a batter that looks slightly radioactive.

Our neighbors kindly brought us an exemplary specimen a few weeks back, not knowing that we'd made approximately ten of them in the prior few weeks (this probably would have been a little hard to admit). They didn't chop up the kimchi or onion nearly as much, which made for perhaps a more desirable texture.

The process is simple and they cook quite quickly — the only tricky part is the flip. Give it a try either out of love for this stuff or simply as a way to pass it off on unsuspecting guests.


Kimchi Pancake
Makes Two Large Pancakes
10 Minutes Prep, 10 Minutes to Cook

The Goods
  • 2 Cups Coarsely chopped kimchi
  • 8 Tbsp. Kimchi juice
  • 1/4 Onion, thinly sliced
  • 1 Cup Flour
  • Scant 1/2 Cup water
  • 1 Tsp. Sugar
  • 1 Tsp. Salt
  • 1 Tbs. Oil for the pan

The Procedure
  1. Add everything but the oil together in a bowl and mix until combined.
  2. Heat a half tablespoon of oil in a large nonstick pan over medium high heat.
  3. Add half the above mixture (or less if making smaller pancakes) and spread around until it is reasonably thin, a bit shy of a half inch thick. Cook for a few minutes until the bottom is crispy and beginning to brown.
  4. Flip using your preferred method, then cook until the other side is also beginning to brown. Remove, and add a bit more oil before making the next one.
  5. Either cut up before serving or simply tear at it with chopsticks, either way works.

NB: Go for the aerial flip.