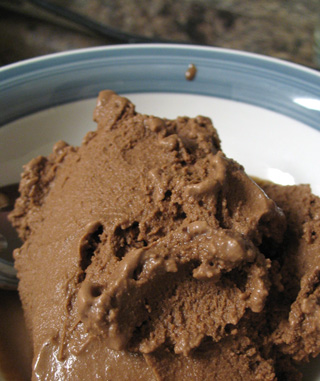
The most laborious task here is holding the dewar up for the few minutes it takes to get the mixture down to temperature. Whatever ingredients you want to use should be combined with the dairy until homogenous. Something that's taken for granted in the lab, this stuff is still pretty cold. Stick a hand in a cup quickly and you'll be fine — just don't grab whatever object you've inevitably subjected to the cryogen. I would avoid plastic and glass bowls, both of which don't love thermal shock. A stainless steel vessel is probably best.
Really this turned out exceptionally well: creamier than I would have imagined. Additionally the process is not terribly sensitive to starting conditions, as my measurements were less than thorough. I would highly recommend experimentation. As for a source of the stuff, surely you know a few physicists or chemists...
Dark Chocolate and Espresso Ice Cream
 The Cake
- 3.5 Cups whole milk
- 1 Cup heavy cream
- 1 Cup sugar (raw)
- Around 0.4 Lbs. dark chocolate
- Two double-shots espresso (or strong coffee)
- Pinch of salt
- A few liters liquid nitrogen.
 The Whole Shebang
- Melt the chocolate in the dairy on the stove, also adding the sugar and allowing it to fully dissolve. Throw in a pinch of salt for good luck.
- Add the shots of espresso or coffee off heat.
- (If using a stand mixer) Add the mixture to the bowl and set up the paddle attachment. Get things going on low speed before letting loose a slow stream of liquid nitrogen into the bowl. Check periodically to see if anything has frozen to the sides, if so it can generally be scraped off with one utensil or another to join the rest of the bowl's contents.
- (If braving by hand) Put on a glove, seriously. Grab a whisk for the preliminary stages and generally follow along with the other instructions until the mixtures gets hard enough to warrant switching over to a spoon.
- (If using a hand-mixer) Probably wear a glove here too, really you are on your own here.
- Keep adding the liquid slowly until the mixture starts to firm up, here I would crank up the speed a bit to make sure everything gets uniformly cooled. Continue further until everything gets stiff — you'll know by taste when the texture is right.
 NB: Adding the liquid too quickly can cause local regions to freeze and gunk up the mixer, scrape the sides of the bowl and pause for a while until you reach thermal equilibrium.