Freakin' Cold Ice Cream

Monday, September 6, 2010

Prolific safety gear, careful planning, mise en place — not so much. Though one might think making liquid nitrogen ice cream requires some sort of scientific apparatus, a steady pour and persistence is all it takes. I wouldn't want to do this by hand, but in a pinch a wooden spoon and ski glove could probably get you through the evening with all appendages attached.

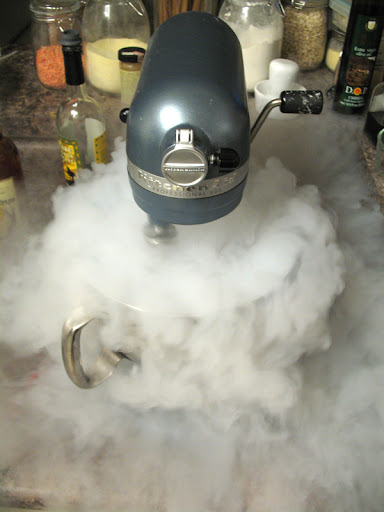
The most laborious task here is holding the dewar up for the few minutes it takes to get the mixture down to temperature. Whatever ingredients you want to use should be combined with the dairy until homogenous. Something that's taken for granted in the lab, this stuff is still pretty cold. Stick a hand in a cup quickly and you'll be fine — just don't grab whatever object you've inevitably subjected to the cryogen. I would avoid plastic and glass bowls, both of which don't love thermal shock. A stainless steel vessel is probably best.

Really this turned out exceptionally well: creamier than I would have imagined. Additionally the process is not terribly sensitive to starting conditions, as my measurements were less than thorough. I would highly recommend experimentation. As for a source of the stuff, surely you know a few physicists or chemists...

Dark Chocolate and Espresso Ice Cream

The Cake
  • 3.5 Cups whole milk
  • 1 Cup heavy cream
  • 1 Cup sugar (raw)
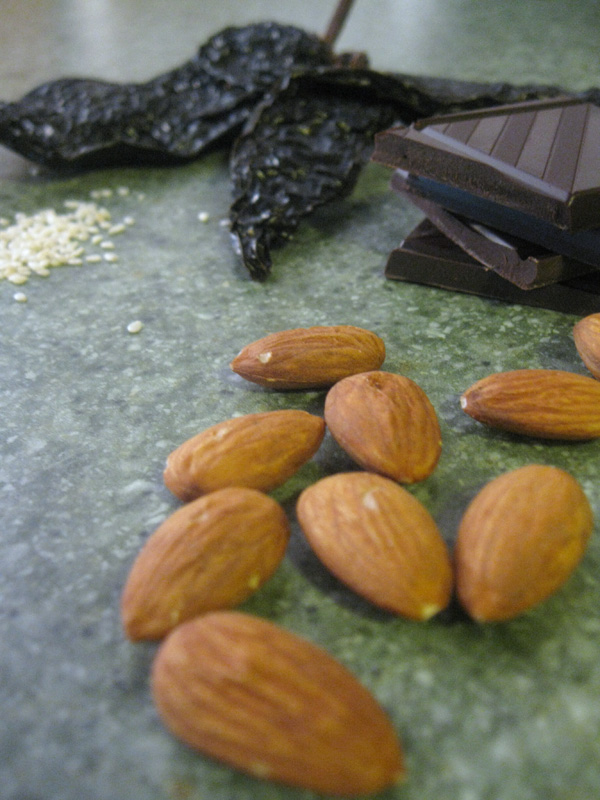
  • Around 0.4 Lbs. dark chocolate
  • Two double-shots espresso (or strong coffee)
  • Pinch of salt
  • A few liters liquid nitrogen.

The Whole Shebang
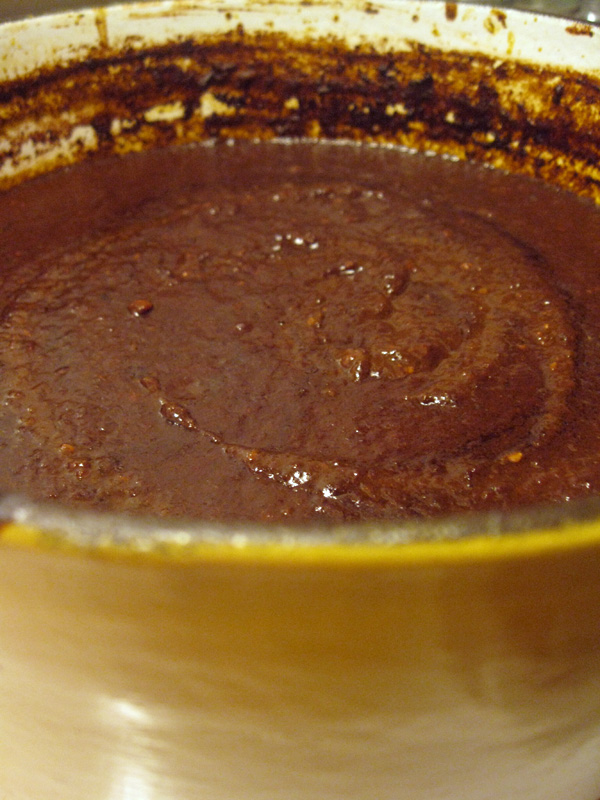
  1. Melt the chocolate in the dairy on the stove, also adding the sugar and allowing it to fully dissolve. Throw in a pinch of salt for good luck.
  2. Add the shots of espresso or coffee off heat.
  3. (If using a stand mixer) Add the mixture to the bowl and set up the paddle attachment. Get things going on low speed before letting loose a slow stream of liquid nitrogen into the bowl. Check periodically to see if anything has frozen to the sides, if so it can generally be scraped off with one utensil or another to join the rest of the bowl's contents.
  4. (If braving by hand) Put on a glove, seriously. Grab a whisk for the preliminary stages and generally follow along with the other instructions until the mixtures gets hard enough to warrant switching over to a spoon.
  5. (If using a hand-mixer) Probably wear a glove here too, really you are on your own here.
  6. Keep adding the liquid slowly until the mixture starts to firm up, here I would crank up the speed a bit to make sure everything gets uniformly cooled. Continue further until everything gets stiff — you'll know by taste when the texture is right.
NB: Adding the liquid too quickly can cause local regions to freeze and gunk up the mixer, scrape the sides of the bowl and pause for a while until you reach thermal equilibrium.

Vegetable in Name Only

Sunday, August 8, 2010

The similarities between this post and last do not cease at mere geometry of the subject matter. Logic forces me to admit that most quick-breads are hardly deserving of the connotation of nutrition evoked in their names. Zucchini bread is, let us face the facts, cake. Referring to it as such may decrease consumption — an unfortunate affair since this "bread" has come to serve as a zucchini disposal technique as of late. What else to do with the freakishly large specimens sturdy enough to use as columns for a portico? One gigantic zucchini usually affords me two loaves and change — this recipe is generally forgiving in proportions, so a bit of extra plant matter won't perturb the balance.

As usual I've opted to substitute butter where most recipes call for oil. In my mind it's better to consume fat that tastes wonderful than to simply dump in a bunch of tasteless canola oil. It's best to fill loaf pans less than halfway to facilitate proper cooking — a double batch of the recipe below manages well in three pans, while a single batch should probably be done in two. It keeps for what seems like forever, though one is hard pressed to let such a thing age beyond a few days.

Zucchini Cake

The Cake
  • 3 Cups Flour
  • 1.5 Cups Sugar (raw)
  • 0.5 Cups Butter
  • 1 Tsp. Baking Soda
  • 1 Tsp. Baking Powder
  • 1 Tsp. Salt
  • 3 Tsp. Cinnamon
  • 2 Cups Grated Zucchini
  • 3 Large Eggs
  • 3 Tsp. Vanilla

Fabrication
  1. Preheat to 325F.
  2. Melt the butter and bring the eggs up to room temperature. Mix the butter and sugar together vigorously before adding the eggs. Add the remaining wet ingredients, including the zucchini. Mix together all of the dry ingredients in a separate bowl, and then combine the two until uniform.
  3. Butter enough loaf pans such that the batter will not go much over half the volume of any individual pan. Pour in the mixture and shake the pans to settle everything.
  4. Bake for somewhere around 45 minutes, until something plunged into the thickest part of the loaf comes out clean. Rotate the pans in the oven once or twice, since in my experience burning is a distinct possibility. Let cool before slicing.


NB: More batches make more friends.

Happy Birthday Meg!

Saturday, June 19, 2010

Welcome to Meg's virtual cake! Kenya is well beyond the shipping range for perishable goods, so this will have to suffice. Cakes are apparently not my thing, as I can tell from more data points than just this one. Bagels and bread seem more familiar territory, none of these weird ingredients like sugar and fat. Nonetheless I stuck a candle in what amounts to a coffee-cake and declared my attempt celebratory but lacking in finesse. It's better than sticking a candle in a bagel.

So here is to a quarter century, celebrated wandering around rural Kenya (sounds fun to me!).

Another momentous occasion here is that I don't think I've ever actually purchased hard alcohol, no kidding! For some reason it felt like I should be required to produce some identification beyond a drivers license — the equivalent of a commercial license or something. Alas, it was anticlimactic to say the least. I'll have to figure out something to do with this rum — I'm thinking back to Anna's adventurous Bananas Foster Cocktail and wondering whether I could really have more than one of those despite their allure.

The inspiration here is, of course, the bellowing cake-monger at the farmers market. He espouses his butter-rum cake as a cure-all, bound to increase your energy level as well as your GPA. My cake will raise my carbon consumption a hair, but I don't foresee any secondary benefits. The recipe is an amalgam of a few random samples distributed across the internet — buttermilk and baking soda won out as the leaveners.

Butter-Rum Cake

The Cake
  • 3 Cups Flour
  • 2 Cups Sugar
  • 1 Cup Butter
  • 1 Cup Buttermilk
  • 4 Large Eggs
  • 1/2 Tsp. Baking Soda
  • 1 Tsp. Baking Powder (not really necessary)
  • 1 Tsp. Salt
  • 2 Tsp. Vanilla

The "Sauce"
  • 1/4 Cup Soft Butter
  • 1/4 Cup Water
  • 1 Cup Turbinado Sugar
  • 4 Tbs. Rum

Fabrication
  1. Preheat to 325F.
  2. Bring the butter and eggs up to room temperature. Cream the butter and sugar together, preferably with some sort of mixer. Add the eggs (on slow speed at first lest they fly out of the bowl) one at a time. Combine wet and dry ingredients separately and add, alternating between the two until everything is incorporated.
  3. Butter a pan, hopefully a bundt pan, and lightly dust with flour as shown in the picture above. Whack the pan a few times to make sure there is an even coating and dump out any loose flour.
  4. Bake for about an hour in a large pan or about 25 minutes for several smaller cakes.
  5. Bring to a boil all the sauce ingredients aside from the rum and then remove from heat. Now stir in the rum.
  6. Poke an absurd number of holes in the top and dump the sauce on slowly so it saturates the cake.
  7. Coax out of the pan and enjoy. Perhaps sing happy birthday.


NB: Happy birthday Megan!

Some Representative Crepes

Wednesday, June 16, 2010

My parents have a crepe pan somewhere, of which I'm quite envious. Even though it looks to have been used as a buckler at some point in history, the thing produced perfect crepes. I've now, with this comparatively fancy non-stick pan, produced more than a few specimens resembling cardboard more than any sort of a pancake. What could be the problem? Apparently butter is as crucial a factor for the texture and appearance as it is for the taste. Don't skimp on the butter in the non-stick, coat liberally.

We never seemed to have this problem in the purple house in undergrad, but in that house we also went through 12 sticks of butter at thanksgiving, case closed. I remember the construction of a crepe cake there — based purely on a passing mention gleaned from some show on the food network. Something like 30 crepes with a pastry cream slathered on top of each. Eating this thing was a chore, and construction was a substantial part of the evening. Crepes have become a less frequent endeavor since.

These latest ones tasted best the first time I made them, after which I failed to write anything down. I think I've worked approximately back to that level now. The crepes will be excellent as long as the batter is thin and there is enough batter in the pan. The filling can be composed of anything one cares to prepare, and here I've opted for some mushrooms, caramelized onions, and spinach. The crepes take by far longer than any other element of the meal unless you have a second pan running. This really isn't an option with the amount of stove real estate I have to work with, so really you may as well just get all the crepes done ahead of time so you don't get distracted by other tasks while churning them out.

Mushroom and Spinach Crepes
For perhaps 20 crepes

The Crepe Batter
  • 2 Eggs
  • 3/4 Cup Milk
  • 1/2 Cup Water
  • 1 Cup Flour
  • 3 Tbs. Melted Butter with reserves
  • 1/2 Tsp Salt

The Filling
  • 1 Lb. or more Mushrooms
  • A few handfuls of "adult" spinach
  • 2 Large onions, sliced thin
  • Sour Cream
  • Thyme or other spices
  • Maybe wine for deglazing
  • Perhaps some parmesan for the filling as well

The Crepes
  1. Blend the ingredients in a blender or in a bowl with an immersion blender until smooth. Refrigerate for a few hours if possible. The texture should be kind of like that of heavy cream, but a bit more on the thin side.
  2. Heat a non-stick pan (or otherwise) until water skips around the surface daintily.
  3. Butter the pan so the entire bottom has a nice sheen. Remove from the heat and ladle in some of the batter — quickly gyrate the pan around until all of the batter has set and is relatively even across the bottom. The general method can be seen here
  4. Cook until the bottom is starting to get nicely browned, then flip with your fingers or a spatula. Continue cooking until the bottom is slightly brown (it will be more spotty than anything.)
  5. Adjust the amount of batter to suit your pan size, and repeat!

The Rest
  1. With a liberal amount of butter, saute the mushrooms making sure not to overfill the pan. When done cook the onions slowly until caramelized to some degree (25 minutes maybe.) This would be the opportune time to rinse the spinach, though instead of drying it off just throw it into the pan wet with maybe a dash or two of wine to scrape some bits of the bottom of the pan. Clap on a lid and let the spinach wilt.
  2. Add any spices if desired, and return the mushrooms to the pan until they are heated through. Adjust salt and pepper levels.
  3. Slap a heaping spoonful or two of the mixture in the center of a crepe and add a dollop of cream to smooth things out — the ratio in the picture above is probably a bit excessive on the part of the cream. Add some grated parmesan and roll up the crepes for completion.

NB: I had to use baby spinach here for lack of another choice, but really it doesn't hold a candle to the taste one gets from the mature stuff. The first crepe always fails, so you may as well just eat it as soon as it reaches tolerable temperatures.

Smoky Strawberries

Monday, June 7, 2010

What to do with so many strawberries? At first they were eaten as is, though more recently they've been robbed of their solid nature by perhaps the loudest kitchen appliance ever created. Some sort of dessert was needed this week, and TJs furnished me with an 18 ounce slab of dark chocolate to this end. I've been slightly obsessed with chili-spiced chocolate ever since having some gnarly concoction in Santa Fe over thanksgiving. I normally find chocolate-covered strawberries somewhat boring, so the anchos are meant to make everything a bit more interesting.

As with most experiments, I decided some cumin would even things out a bit. This apparently satisfied some people and turned others off — not everyone seems to have the same cumin tolerance I've developed. I used to have some ancho powder sitting around, but it got used up long ago. Making chili powder is luckily a pretty easy affair as long as one has an extra coffee grinder sitting around (or doesn't mind a little kick in the morning coffee). I would recommend adjusting the amount of chili powder purely by taste, as my measurements were highly imprecise.

As I said before one can omit the cumin, though I'd be curious to go all the away and shoot for mole-covered berries. That would be interesting!

Strawberries Covered in Ancho Chili Chocolate
For around two dozen large strawberries

The Chili Powder
  • Two ancho chilies, stemmed and seeded, torn into smaller pieces
  • One, two, or maybe no tbsp. cumin seeds
  • 1/2 Tbsp Oil

The Rest
  • 2 Tbsp. Butter
  • 8 Oz. Dark Chocolate
  • Around 4 loose Tbsp. Chili Power, above
  • 2 Dozen or more strawberries, washed and dried
  • Wax paper

The Chili Powder
  1. Heat a skillet to medium heat and add oil
  2. Add chilis, torn into smaller pieces, and coat with oil. Allow to toast until very fragrant.
  3. Add cumin and toast until its smell can be discerned
  4. Remove from heat and let cool before grinding up in coffee or spice grinder

The Rest
  1. Put wax paper on a sheet pan and let it chill in the freezer while melting chocolate
  2. Set a metal bowl over a saucepan of simmering water to approximate a double boiler.
  3. Add the butter, let it melt before adding the chocolate. Stir until the chocolate is completely melted — the length of this process will depend largely on the size of the chocolate pieces.
  4. Add chili powder until the desired flavor is arrived at. I think I ended up using a full 4 loosely packed tablespoons or so. A dash of salt may also be desired.
  5. Lower heat to almost nothing, dip strawberries so they get a reasonably thick coasting, then place on the wax paper to cool. Place the sheet pan back in the fridge until everything has solidified and cooled back down.

NB: It will be really hard to make this too spicy given the nature of ancho chili, the adventurous soul may try adding some cayenne for a real kick.

Fish in a Bag

Tuesday, June 1, 2010

The threat of summer has been looming here for some time. One would think that we wouldn't suffer from such a drawn out spring here in Sunny Southern California, but this has been the case. This weekend seemed the starting point of warmer weather, though, with the added benefit of inciting grilling sessions. This particular entree is something I've never cooked outside of an oven, but decided to throw on a grill earlier as an experiment.

A heart-shaped piece of parchment is transformed into a steaming vessel — the moisture in the vegetables isn't necessarily enough to steam everything so I typically throw in some lemon juice and wine. As with most of my recipes, it consists largely of those items that were on hand (fish excluded of course). I opted for shallots and asparagus, but squash would probably be a better summer choice. The couscous is highly optional, but rounds things off in a way. I dripped a few tablespoons of water directly onto the couscous to make sure it didn't dry out during cooking. This seemed to work pretty well though the heat from the grill seemed to give it a bit of crunch in some places. Normally I cook these sorts of packages in the oven at, say, 425F. Today I had next to no idea what clip the grill was going at, and the best indicator of doneness was actually the temperature of the fish as felt directly through the parchment.

Folding the parchment up can be a little tricky, so I urge one to take part in the following visual aid. The most important part of the procedure is keeping the bag relatively steam-tight, so care should certainly be taken when the bag is being closed. Most helpful to one's success is the avoidance of an over-stuffed package.

Pictures of the final product are lacking not for want of aesthetics, but instead because I felt somewhat awkward snapping pictures of my food in the particular circumstances. All I had with me was my phone though, and those pictures would not have benefited from the faux-professionality of extreme depth-of-field.

On to the fish, which is usually referred to as being cooked "en papillote." I will spare you from such pretensions. Simply multiply the recipe by the number of people you want to feed.

Salmon in Parchment
For One Serving

The Crust
  • Parchment paper
  • 1 Salmon (or other fish) fillet
  • 1 Shallot, minced
  • Few stalks asparagus
  • Few tablespoons couscous, with enough water to hydrate
  • Few small bits of butter
  • Few tablespoons white wine
  • Few slices lemon
  • Seasoning


Everything Together
  1. Preheat oven to 425F or start the grill and hope for success.
  2. Tear a piece of parchment larger than you think is necessary to fold up your ingredients. Fold it in half to easily cut out a heart shape.
  3. Start by placing the vegetables: cut fairly small to allow for easy steaming, position on one half of the parchment near the heart's cleft. The point of the heart is soon consumed by folds, so leave this area untouched unless you want to attempt folding asparagus.
  4. Add the couscous and enough water to hydrate (just a few tablespoons), then a tablespoon or two of wine. Season lightly and add a pat or two of butter.
  5. Stack the fish on top, season, and then add the lemon wedges. Add some more butter or olive oil if you prefer.
  6. Roll up in the manner shown here, making sure to keep everything pretty tight.
  7. Cook for 12 minutes in the oven, or check frequently around that time on the grill. In either case the fish should be, well, fish temperature to the touch while the parchment becomes somewhat browned.


NB: The visual aid, referenced above, reveals that this can be prepared even more easily by microwaving for 5 minutes on high.

Finally, a Quiche

Saturday, May 1, 2010

Food blog I have forsaken thee — to what limited readership exists I issue an apology for this natural stage in the life of a blog. A humbling thought is that more people have probably looked at this site than will ever read my academic papers. All the more reason to photograph my food from time to time — clearly it is fame that I seek.

Let me attempt to ease back into this with a relatively low key post: the quiche. Half a piecrust and a smorgasbord of dairy and other ingredients pulled from the far reaches of the refrigerator. I happen to have a tart pan, though frankly I find the thing more trouble than it may be worth. Magically my crusts retract down the already-short sides, perhaps an artifact of pre-baking. My measurements are for such a vessel, though, so those of you opting for an actual pie dish will need to increase the volume of the filling by nearly half (a complete guess of course). Another irregularity in my measurements will be the number of eggs: these things are enormous. It seems the wealth of Orange County has been invested in chicken feed, since the eggs I get from the farmers market could be mistaken on easter for avocados.

The astute reader will note that the leading photograph contains no chard, but rather spinach and bacon. No matter, the procedure is identical.

A Quiche of Chard or Similar Things

The Crust
  • 1 1/4 Cup Flour
  • 1 Stick Cold Butter
  • Dash Salt
  • Ice Water

The Filling
  • Several leaves of chard, stems diced and leaves coarsely chopped
  • A reasonably sized onion, thinly sliced
  • Perhaps some bacon
  • Three gigantic or maybe four normal eggs for a tart pan, more for a pie dish
  • 1/2 Cup sour cream, more for a pie dish
  • 1/2 Cup whole milk, more for a pie dish
  • Pinch of nutmeg
  • More seasoning

The Crust
  1. Either in a food processor or by hand, process the butter, flour, and salt until coarsely mixed with some larger bits. Add just enough water to make the dough cohere when pressed together.
  2. A handful at a time smear the dough on your work-surface — ostensibly to increase flakiness.
  3. Gather into a fattish pancake and refrigerate wrapped in plastic wrap for an hour. Preheat oven to 375 F before proceeding further.
  4. Roll out to the necessary size, and after transferring into your dish build up some extra dough at the edge to avoid shrinkage during baking. Poke the bottom with a fork a few times and line with foil and weight with rice or beans (since who has pie weights, really). Bake for 20 minutes, remove foil and bake for another 10.

The Remainder
  1. If using bacon: cook to desired crispiness and remove, leaving a tablespoon or two of fat in the pan.
  2. Saute the onion and chard stems slowly in either bacon fat or olive oil, until the onions are very soft.
  3. Give the chard stems a quick rinse and throw them in while still wet. Cover and let steam until the chard has cooked down.
  4. Meanwhile whisk together the other ingredients, adjusting volume as you see fit.
  5. Distribute the chard and onion mixture in the shell and then pour in the dairy being careful to avoid overflow.
  6. Bake for 35-40 minutes until browned and puffy.

NB: If the crust browns too much before the quiche is finished, cover the entire thing with a sheet of foil. Pre-baking the shell is probably optional given a slightly longer bake, though I am too adjusted to the procedure to try such a heresy.

The Usual Breakfast

Thursday, March 11, 2010

If there is one breakfast food that has claimed a majority among all others in my life, it has been the bagel. Everything, perhaps sprouted, doused with cream cheese — not overflowing of course. At any rate, I go through these things at such a rate that it seems silly to head to the store and buy them every four days. This isn’t to say that biking around with sacks of flour is less annoying, but then there is the satisfaction of making one of those things that seemed at one time unfeasible.

As with my recent baking attempts, the active time in this recipe is some vanishing fraction of the entire process. Mix for two minutes, wait for two hours. Mix some more, then wait overnight (only after poking holes, of course.) There really is nothing obscure about the ingredients aside from the optional malt syrup, of which I stole a few tablespoons during the last batch of beer. Molasses makes a good substitute here, as long as it is used sparingly.

After a few attempts I’ve thought it best to replace roughly a quarter of the flour with whole wheat, a substitution that has had no measurable impact on the final texture of the bagels. On this note, I must confess that have a much airier texture than one’s average bagel — so far I’m undecided as to whether my preference lies with the chewy variety I’ve grown to love or these behemoth fluffy newcomers.

Topping are limited of course by only one’s imagination. While onions and garlic are fun to apply, I find that they end up more as carbon than anything else when toasted. For this reason I will stick to seeds only. I haven’t experimented with any sorts of flavored dough, and see no reason to muck with what has been a very tasty final product.

As for the intended volume: make more than you think necessary. This is a cliché line for baked goods, but bagels have many more justified uses than most. I haven’t yet seen someone attempt to make a sandwich capped by, say, chocolate chip cookies. A dozen to start never leaves more than one or two at the end of the usual Sunday brunches here, though a ravenous lot we are.

At the risk of being the three-thousandth person to blog about Peter Reinhart’s bagel recipe, I will proceed shamelessly with an only slightly modified recipe. Also, a thanks to Greg Jordan, who brought my attention to the bagels and the book they came from more generally.

Slightly Whole-Wheat Bagels
Adapted From Peter Reinhart's
The Bread Baker’s Apprentice
Makes 12 Bagels

Sponge
  • 1 Tsp. Instant (Rapid Rise) Yeast (0.11 Oz.)
  • 4 C. Bread Flour (18 Oz.)
  • 2.5 C. Water, not too cold (20 Oz.)

Actual Dough
  • 0.5 Tsp. Instant (Rapid Rise) Yeast (0.11 Oz.)
  • 2.0 C. Bread Flour (10 Oz.)
  • 1.75 C. Whole Wheat Flour (8 Oz.)
  • 2.75 Tsp. Salt (0.7 Oz.)
  • 1 Tbs. Malt Syrup or Molasses (0.5 Oz.)
  • Semolina flour or cornmeal for dusting
  • Parchment paper a must!
  • Seeds and coarse-grained salt for topping bagels

For The Sponge
  1. Simply stir together until smooth the detailed ingredients. If using active dry yeast, perhaps warm up some of the water and let the yeast proof for a few minutes before adding the rest of the water and flour.
  2. Cover and let sit for one hour at room temperature.

For The Actual Bagels
  1. Add the rest of the dough ingredients to the sponge and knead by hand or machine until the dough passes the window-pane test. This will be in the 6-10 minute regime.
  2. Divide into 12 equal pieces and form into tight balls on slightly dampened counter using repetitive “wax-on” or “wax-off” (but not both) maneuvers. Let sit covered on counter for 20 minutes or so.
  3. Poke a hole in the center with thumbs and work into a torus. Make the hole much larger than one would expect, the shape one might have in mind is that of a car tire (without the squareness of course.) Place on a lightly oiled parchment sheet (in a sheet-pan), and let rise for 30 minutes or so, longer if nippy outside.
  4. Put in fridge until the next day, or perhaps the day after.
  5. Preheat oven to 500F with the racks in the center. Bring to a boil a good sized vat of water primed with a bit of baking soda. Prepare seed and salt mixture ahead of time.
  6. Without crowding the vat, boil the bagels for roughly a minute per side. Dust the parchment with semolina or corn meal in the meantime, and return the bagels to the sheet pan when finished. Immediately sprinkle the seed mixture on the bagels in the desired quantity while they are still wet.
  7. Bake for 20 minutes, rotating pans and shelves halfway. This may be longer or shorter depending on your oven, just cook them until they look like bagels (malt syrup and molasses make them substantially darker than they would otherwise become during baking.)
  8. Let cool and enjoy!

NB: Don’t handle them too much to avoid deflating before baking. Make sure to drain thoroughly before setting back down on the dusted parchment.

Ole Mole

Monday, January 25, 2010

It is once again my honor to present a post from colder climates, not from Mexico as this post might have one believe. And yes, my bike does have a name. Without further ado, here is Meg!

When trying to come up with a name for Graham's bike, his all-important transportation compatriot, we tended towards Mexican foods. Southern California and our affinity for good Mexican were probably the inspiration, but for some reason "taco" and "nacho" were stricken from the list, perhaps because the nacho fetish is more mine than Graham's. Alas, "mole" was the obvious choice, the beautiful brown sauce that came into our lives senior year of college.

I spent a good part of my winter break senior year in the Huatusco region of Mexico trying to understand the impact of Fair Trade certification on coffee farmers. It was not the party-filled adventure that most Americans associate with the coast of Mexico, however I did need a souvenir and was rightfully instructed that mole was the proper choice. The wonderful coffee farmer who hosted me drove down a windy road to a little, mostly dilapidated, house. Together, we walked up to the front door and knocked, and a plastic bag of brown goo was presented to me. I must admit that my initial thoughts were mostly negative: "you want me to go through US customs, admit to hanging out on Mexican farms with all sorts of livestock, and carry this bag of unidentifiable mass?" But, I did make it back to Boston with mole in hand, enjoying it's complex tastes shortly after taking a much needed shower.

Imagine. A sauce of chocolate, chilies, almonds, cinnamon, tomatoes, onion, sesame seeds... the list goes on. This is mole poblano, one from a long line of moles native to Mexico. It can be served over any meat (this particular recipe calls for an entire turkey) or with tamales or enchiladas. I should make it clear upfront, though, that this is not a quick meal. Most Mexicans only prepare mole on special occasion given the length of time required. The recipe I am about to present actually recommends spreading the tasks over four days, although I think an entire day spent at home (with ingredients already procured) is sufficient. On our first attempt, we spent about three hours, but most seem to agree that more time means more amazing mole. The aromas aren't so bad either.

This recipe makes about 3 quarts (apparently enough to feed a dozen hungry graduate students with leftovers.)

Mole Poblano
Adapted From Rick Bayless'
Authentic Mexican

Everything and Then Some
  • 16 medium dried mulato chiles
  • 5 medium dried ancho chiles
  • 6 dried pasilla chiles
  • 1 dried chipotle chile
  • 1/4 cup sesame seeds
  • 1/2 teaspoon coriander seeds
  • 1/2 cup plus 2 tablespoons vegetable oil (or lard)
  • 1/3 cup unskinned almonds
  • 1/3 cup raisins
  • 1/2 medium onion, sliced
  • 2 cloves garlic
  • 2 slices bread (stale preferred but toasted works)
  • 15 oz. can of diced or crushed tomatoes, drained
  •  3 oz. Mexican chocolate, roughly chopped (or 3 tablespoons unsweetened cocoa)
  • 4 cloves (or 1/8 teaspoon ground)
  • 10 black peppercorns ( or 1/4 teaspoon ground)
  • 1 inch cinnamon stick (or 1 teaspoon ground)
  • 8 cups broth (I used chicken)
  • salt (to taste)
  • 1/4 cup sugar (or to taste)

The General Ordeal
  1. Prepare. Seriously. With this many ingredients, you need to accumulate, chop, and measure everything before turning on the stove. I like to put my ingredients in lots of little bowls so they are on hand and ready to be added to the pot. In separate bowls, measure out the almonds, chocolate, sesame seeds, raisins, coriander. If using whole peppercorns, cinnamon, and cloves, pulverize those together (either with a mortar and pestle or a spice grinder) and dump those into their own bowl. Slice half an onion and add to its own bowl. Get out your two slices of bread and peel two cloves or garlic. Have your broth and oil (or lard) on hand. Drain the can of tomatoes and dump into a large bowl (other things will be added). I will call this the "tomato bowl."
  2. Now the chiles. Carefully devein and remove seeds (keep 2 teaspoons of the seeds and add to another bowl), ripping into flat pieces. Just pile them all together somewhere in your cooking area.
  3. Time to turn on the stove. I use a dutch oven for the process, but a large pot will work too. Turn the stove on to medium heat. First we will toast the seeds: sesame, coriander, and chili (not the chiles themselves, just the reserved seeds). Dry toast (no oil) until they are slightly browned. I chose to do them separately just to be sure not to burn. Add the toasted seeds into the tomato bowl. Add 1/4 cup oil to the dutch oven. Once hot, add the almonds and toast for about 4 minutes Remove from pot and add to the tomato bowl. Add the raisins and cook until they start to puff up. Remove and add to the tomato bowl. Then add the onions and garlic and let cook down for about 8-9 minutes, until soft but not brown. Add to the tomato bowl. Add the two pieces of bread, just a few seconds on each side, then remove, tear into small pieces and add to the bowl. Add the chocolate, ground peppercorns, cinnamon, and cloves into tomato bowl too. Set this bowl aside for now.
  4. Now onto roasting the chiles. Chile fumes can get intense, so you might want to warn your housemates and also turn on the exhaust fan above your stove. In the same dutch oven still on medium heat, rid of the old oil and add another 1/4 cup vegetable oil (or lard). Once hot, dump in a handful of chiles. You want to brown them a bit on each side, just a few seconds each. Once they seem a bit soft, take them out of the pot and dump into a large bowl (a new bowl, not the tomato bowl). Repeat with all of the chiles. Bring some water to a boil and dump over the bowl of toasted chiles. You want to submerge them all, so I put a plate on top to make sure they all remain under water. Let sit for at least one hour (I opted for 1.5 hours).
  5. Time to puree. The contents of each of our two bowls will be pureed separately. Add 1/4 of the mixture from the tomato bowl into the bowl of a food processor along with 1/2 cup of broth. Puree until smooth. Repeat with each portion of the tomato mixture (use 2 cups broth total for all of the tomato mixture). Dump back into a clean bowl. Now we will do the same thing with the chiles. First, drain the chiles in a colander to remove steeping water. I took 1/3 of the chiles at a time into the food processor along with 1/2 cup broth. Repeat with all portions of chiles (use 1.5 cups broth total for all of the chile mixture). Return to a separate clean bowl.
  6. Now we can combine. Reheat your dutch oven or pot and add 2 tablespoons oil. Once warm, add the chili puree mixture through a metal strainer, trying to rid of larger chunks. I started to do this, then decided I wanted those chunks of chili and just dumped it all in. Completely up to you. Then stir constantly for about 5 minutes or until the mixture appears to thicken. Do the same thing with the other mixture, adding to the chile mixture, straining of you desire. Stir again and let cook together for about 5 minutes. Add another 4 cups of broth or so (the consistency should resemble thick cream) and let simmer on low heat for at least 45 minutes (I went for about 2 hours). You probably want to cover, at least partially, to prevent a large amount of mole from splashing onto your stove top. Here, add a pinch of salt and the sugar. Stir and taste. Feel free to add whatever other spices seem necessary and serve with your chosen accompaniment.

NB: I served this over chicken, but I am sure you can be more creative. The sauce could easily be made vegetarian by using vegetable broth and serving with a variety of squash or pumpkin.

Almost Healthy Dessert

Wednesday, January 20, 2010

It contains an entire carrot and an entire potato, though any potential health benefits are surely staved off by the half pound of butter. This falls in line with the black bun with its recent return to the Rowlands family holiday baking exploits.

I'll make this a quick one — since the recipe really doesn't require much in the way of preparation. The cooking time, however, is a bit of a stretch coming in at three hours. I'm to believe that a pudding mold is a reasonably essential tool in this endeavor, though I imagine some ingenuity with a bundt pan and aluminum foil might be sufficient. I don't own one of these things, even with my relatively high tolerance for obscure culinary paraphernalia. I'll spend the rest of the post assuming you've worked something out.

To completely ruin any illusions of healthfulness, this pudding should be doused with hard sauce — which is literally a paste of flour and confectioners sugar, though rum can make an appearance as the least worrisome ingredient.

Carrot Pudding

The Pudding
  • 1 Cup Flour
  • 1 Cup Sugar
  • 1/2 Cup Butter
  • 1 Tsp. Baking Soda
  • 1 Cup Grated Raw Carrot (2 Medium)
  • 1 Cup Grated Raw Potato (2 Smallish)
  • 1/2 Cup Currants
  • 1/2 Cup Raisins
  • 1/2 Tsp each Nutmeg, Cinnamon, and Ground Cloves

The Sauce
  • 1/2 Cup Soft Butter
  • 1 1/2 Cup Sifted Confectioners Sugar
  • 2 Tbs. Rum or Brandy

Fabrication
  1. Sift the dry ingredients into a bowl, then stir in the fruit until covered.
  2. Add butter and raw vegetables, mixing until combined
  3. Turn into greased pudding mold and steam for 3 hours.
  4. Cream the butter and sugar together before incorporating the rum or brandy. The hard sauce must be stored in the fridge for it to reach its namesake consistency, though I suspect that the "hard" might refer to something else altogether.

NB: Best served warm. 1/2 Cup of nuts can be substituted for currants. Also allspice can be added, though it has been experimentally determined to add little additional flavor.

Don't Fear the Beer

Wednesday, January 6, 2010

I should probably wait until the thing is bottled, carbonated, and consumed — but really I just want to talk about the beer sooner rather than later. This is all-grain brewing attempt number two, following after the batch I lovingly refer to as "Fail Pale Ale." Probably I shouldn't be so hard on that one, especially since it was a somewhat awkward foray into brewing more advanced than Chris and I had attempted before. Partly this was because it was only our second batch, the first having come largely from a goop-filled bag that came with the fermenting buckets. The picture below is from the IPA, as one may have gathered I obviously need to work on my beer photography.

Let me first complain about apartment stoves in this here graduate housing. After visiting friends in NYC, they with their fancy-schmancy gas stoves, I returned here to look down upon some unbalanced and misshapen coils stuck in a bright white cooktop. It's well known white doesn't show stains. These stoves take, and I stress the magnitude of my frustration here, seemingly forever to heat up 6 gallons of water. The better part of an hour, seriously...

This turns brewing into an all-day event, which wouldn't be so much of a problem if we didn't start the process in the afternoon sometime. This can be chalked up to poor planning, though I would like to blame it on the stove nonetheless.

Well anyway — Chris dug up this recipe somewhere that we can't locate anymore. Originally it was supposed to be a coffee porter, though we didn't have the beans on hand to facilitate such frills. The process on this one was pretty simple: a single temperature mash and two relatively small hop additions. We sprung for a secondary fermentation period since the IPA we tried was fairly cloudy.

This would be the second yeast-themed post I was talking about, though I can't really comment on the success one way or another. It's a pretty bare-bones porter, which probably makes sense given our inexperience. Surely we will have an update soon, inside of another three weeks.

Coffeeless Coffee Porter

The Whole Shebang
  • 10 Lbs. 2-Row US Pale Malt
  • 0.5 Lbs. Chocolate Malt
  • 0.5 Lbs. Crystal Malt (120)
  • 2 Oz. Golding Hops
  • White Labs English Ale Yeast
  • 3 Oz. Sugar For Bottling

Abbreviated Process
  1. Steep milled grains with around 3.5 Gallons water for 1 hour at 153F, maintaining temperature by reheating some drained-off mash liquid and adding back to the mash. Stir occasionally.
  2. After recirculating the first few cups of wort, drain off the mash into the boiling pot.
  3. Sparge with another 4.5-5 gallons of 180F water, letting the mash rest for a few minutes before repeating the same draining procedure. Total volume of wort should be 5.5 gallons or so.
  4. Boil 60 minutes, adding 1 Oz. Golding hops at the start and 30 minutes in.
  5. At 30 minutes pitch yeast into a cup of cooled boiled water with 1 tsp. sugar
  6. Cool wort and aerate heavily into primary fermentor, pitching yeast upon completion.
  7. Ferment a scant two weeks before racking into secondary fermentor for another 2 weeks (or your equivalent winter break.)
  8. Mix in boiled sugar with wort in bottling bucket, and rack into sterilized bottles.
  9. Wait another 2-3 weeks for (potential) goodness.

NB: Fingers are crossed...

Brick or Bread?

Sunday, January 3, 2010

Along with a barbecued turkey, this fruit-stuffed rock has fast become a wintertime culinary tradition at my parents' abode. A stunning 10 cups of fruit are packed into 6 cups of flour, resulting in something akin to a gigantic scone. Systematic attempts to incorporate all of the fruit into the dough are seemingly futile — the only successful method has been repeatedly squeezing the dough between one's fingers. The loaf is a traditional Scottish gift presented on New Year's Day (Hogmanay) — presumably as a hangover cure or some such thing. An added benefit of the loaf's density is that is stores for at least as long as it takes to nibble the thing down to nothing.

Cooking can be done either on a baking sheet or a stone — the back of a ceramic flower-pot drip-tray makes a pretty wonderful alternative to more expensive options.

This isn't the second yeast-themed post I mentioned before, though that should be coming soon. This month will probably be spent catching up with all of the posts that I wanted to do last month had I not been focussed on other matters. Bread will probably become a more frequented topic around here, especially since I recently received some bannetons as a gift. Testing one out with a batch of ciabatta dough led to a stunningly "artisinal" loaf, at least by visual standards. Maybe I can start selling the things for $8, which wouldn't be a bad profit margin given that the recipe is of the no-knead variety. If a physics degree doesn't prove fruitful I can always fall back on this.

Without further delay, we have a the doorstop itself. The recipe is through my dad, but originally from the Book of Bread.

Scotland's Black Bun

The Filling
  • 1 Cup Chopped Orange Peel (or 1/2 Cup Dried)
  • 3/4 Cup Chopped Whole Almonds
  • 4 Cups Currants
  • 1 Cup Black Raisins
  • 3 Cups Yellow Raisins
  • 1/4 Cup Brandy
  • 2 Eggs

The Dough
  • 6-7 Cups Flour
  • 1.5 Sticks Butter
  • 2 Tbs. Sugar
  • 1.5 Tsp. Yeast
  • 2 Cups Warm Water
  • 2 Tbsp. Salt

Getting the Dough Started
  1. Let yeast dissolve in the warm water for a few minutes
  2. Stir in sugar, 1 cup flour, and salt until combined. Next alternate adding 2 tbsp. butter and 1 cup flour until you have around 6 cups of flour and the dough isn't overly sticky. Let rest while cleaning and buttering the bowl, then knead for 8-10 minutes until it is smooth and pliable. Return to bowl and cover with plastic wrap.
  3. Let rise somewhere warm until doubled, around two hours.

The Filling
  1. Combine all filling components less the eggs. If using dried orange peel, reconstitute in water before adding.
  2. When the dough has finished rising add the eggs.

Dough: Next Steps
  1. Preheat oven to 350F.
  2. Separate and cover 1/3 of the dough for making the "jacket."
  3. By whatever means necessary, incorporate the filling into the dough.
  4. Roll the reserved piece of dough out into a circle large enough to wrap around the combined dough and filling. Wrap up and use some of the excess material at the top to patch any holes that may have developed. Invert the loaf onto a parchment-lined sheet-pan (the seam you've just formed is on the bottom of the final loaf.)
  5. Using a chopstick, poke a number of steam-holes all the way through the loaf.
  6. Either slide onto stone or bake on sheet-pan for 1.75 hours.
  7. Let cool on rack.


NB: Molasses can be added to achieve the namesake appearance of the bun, though the flavor is quite nice without.